

The next step was to cut the pieces for the split. All back to front supports as well as the split pieces measure 10 inches. Each split piece was individually cut to size with the angles of the actual cut, not the SketchUp plan. They ended up being pretty close.


A recent flooring installation left me with 7/8ths of a sheet of crappy 1/2” thick plywood, so I figured I would make an attempt at what I call a mini simple Henk. Here is how I did it. It may not be the right way or the easy way. It’s how I decided to do it.
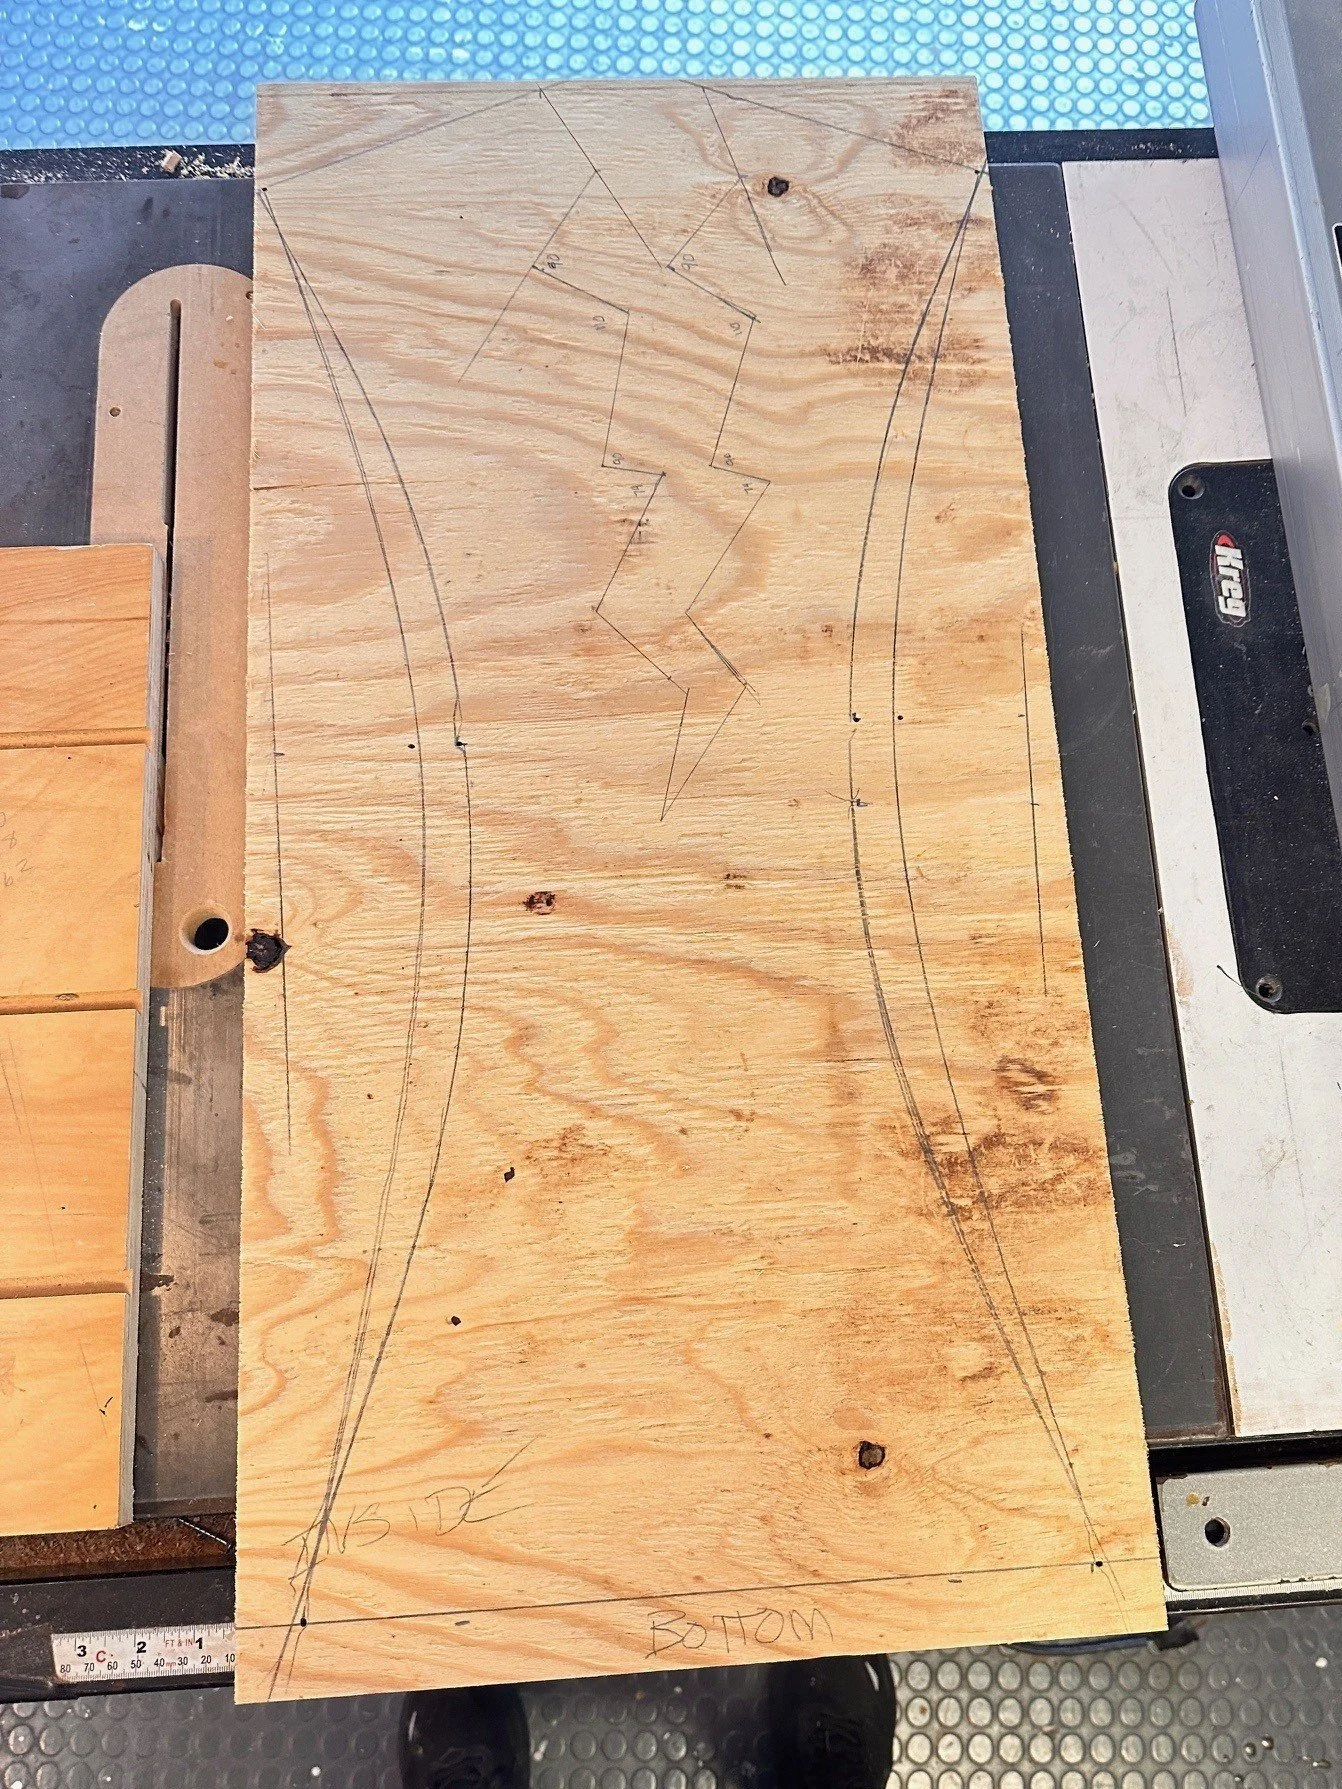
First, I decided to scale the project down in order to save on materials. Who knows, this could be a bust and end up in the trash. I laid out the backboard based on my SketchUp plans. I thought my original plan looked too skinny at the waist, so I changed the inward bulge from 3.5 inches to 2.5 inches. Then I laid out the split, based an angles and line lengths dictated by the SketchUp plan.

The split pieces were then glued up with Titebond II and a touch of CA Glue with Activator at each end. This technique works great and allows the glue-up to go fairly quickly.
The final angle is very acute, so I decided to finish that off with my belt sander.
For the record, I spray painted the inside of the split Krylon Satin Leather Brown. And now that I see it, I’m beginning to like the rough underlayment plywood look. It’s supposed to look a bit “Middle Earth”. I mean after all, this isn’t going to be an heirloom furniture piece.
That’s not what I intended for this piece anyways.
I used a white pencil to mark off where the shelves might wind up, then I glued and screwed the arc supports to roughly center on the drawer marks. Because of the smaller sale, I opted to improvise from the design and make one less half-drawer on the top.
